Notice: Function _load_textdomain_just_in_time was called incorrectly. Translation loading for the simple-lightbox domain was triggered too early. This is usually an indicator for some code in the plugin or theme running too early. Translations should be loaded at the init action or later. Please see Debugging in WordPress for more information. (This message was added in version 6.7.0.) in /home2/h0a3d1p3/staging.ramstudioscomics.com/wp-includes/functions.php on line 6131
Deprecated: Creation of dynamic property WP_Rocket\Engine\Preload\SitemapPreloadSubscriber::$options is deprecated in /home2/h0a3d1p3/staging.ramstudioscomics.com/wp-content/plugins/wp-rocket/inc/Engine/Preload/SitemapPreloadSubscriber.php on line 26
Deprecated: Creation of dynamic property WP_Rocket\Engine\Preload\SitemapPreloadSubscriber::$sitemap_preload is deprecated in /home2/h0a3d1p3/staging.ramstudioscomics.com/wp-content/plugins/wp-rocket/inc/Engine/Preload/SitemapPreloadSubscriber.php on line 27
Notice: Function _load_textdomain_just_in_time was called incorrectly. Translation loading for the rocket domain was triggered too early. This is usually an indicator for some code in the plugin or theme running too early. Translations should be loaded at the init action or later. Please see Debugging in WordPress for more information. (This message was added in version 6.7.0.) in /home2/h0a3d1p3/staging.ramstudioscomics.com/wp-includes/functions.php on line 6131
Deprecated: Automatic conversion of false to array is deprecated in /home2/h0a3d1p3/staging.ramstudioscomics.com/wp-content/plugins/wp-rocket/inc/3rd-party/plugins/seo/yoast-seo.php on line 10
Deprecated: Use of "parent" in callables is deprecated in /home2/h0a3d1p3/staging.ramstudioscomics.com/wp-content/plugins/simple-lightbox/includes/class.options.php on line 501
Deprecated: Using ${var} in strings is deprecated, use {$var} instead in /home2/h0a3d1p3/staging.ramstudioscomics.com/wp-content/plugins/simple-lightbox/includes/class.field_type.php on line 435
Deprecated: Use of "parent" in callables is deprecated in /home2/h0a3d1p3/staging.ramstudioscomics.com/wp-content/plugins/simple-lightbox/includes/class.options.php on line 501
Deprecated: Use of "parent" in callables is deprecated in /home2/h0a3d1p3/staging.ramstudioscomics.com/wp-content/plugins/simple-lightbox/includes/class.options.php on line 501
Deprecated: Use of "parent" in callables is deprecated in /home2/h0a3d1p3/staging.ramstudioscomics.com/wp-content/plugins/simple-lightbox/includes/class.options.php on line 501
Deprecated: Use of "parent" in callables is deprecated in /home2/h0a3d1p3/staging.ramstudioscomics.com/wp-content/plugins/simple-lightbox/includes/class.options.php on line 501
Deprecated: Use of "parent" in callables is deprecated in /home2/h0a3d1p3/staging.ramstudioscomics.com/wp-content/plugins/simple-lightbox/includes/class.options.php on line 501
Deprecated: Use of "parent" in callables is deprecated in /home2/h0a3d1p3/staging.ramstudioscomics.com/wp-content/plugins/simple-lightbox/includes/class.options.php on line 501
Deprecated: Use of "parent" in callables is deprecated in /home2/h0a3d1p3/staging.ramstudioscomics.com/wp-content/plugins/simple-lightbox/includes/class.options.php on line 501
Deprecated: Use of "parent" in callables is deprecated in /home2/h0a3d1p3/staging.ramstudioscomics.com/wp-content/plugins/simple-lightbox/includes/class.options.php on line 501
Deprecated: Use of "parent" in callables is deprecated in /home2/h0a3d1p3/staging.ramstudioscomics.com/wp-content/plugins/simple-lightbox/includes/class.options.php on line 501
Deprecated: Use of "parent" in callables is deprecated in /home2/h0a3d1p3/staging.ramstudioscomics.com/wp-content/plugins/simple-lightbox/includes/class.options.php on line 501
Deprecated: Use of "parent" in callables is deprecated in /home2/h0a3d1p3/staging.ramstudioscomics.com/wp-content/plugins/simple-lightbox/includes/class.options.php on line 501
Deprecated: Use of "parent" in callables is deprecated in /home2/h0a3d1p3/staging.ramstudioscomics.com/wp-content/plugins/simple-lightbox/includes/class.options.php on line 501
Deprecated: Use of "parent" in callables is deprecated in /home2/h0a3d1p3/staging.ramstudioscomics.com/wp-content/plugins/simple-lightbox/includes/class.options.php on line 501
Deprecated: Use of "parent" in callables is deprecated in /home2/h0a3d1p3/staging.ramstudioscomics.com/wp-content/plugins/simple-lightbox/includes/class.options.php on line 501
Deprecated: Use of "parent" in callables is deprecated in /home2/h0a3d1p3/staging.ramstudioscomics.com/wp-content/plugins/simple-lightbox/includes/class.options.php on line 501
Deprecated: Use of "parent" in callables is deprecated in /home2/h0a3d1p3/staging.ramstudioscomics.com/wp-content/plugins/simple-lightbox/includes/class.options.php on line 501
Deprecated: Use of "parent" in callables is deprecated in /home2/h0a3d1p3/staging.ramstudioscomics.com/wp-content/plugins/simple-lightbox/includes/class.options.php on line 501
Deprecated: Use of "parent" in callables is deprecated in /home2/h0a3d1p3/staging.ramstudioscomics.com/wp-content/plugins/simple-lightbox/includes/class.options.php on line 501
Deprecated: Use of "parent" in callables is deprecated in /home2/h0a3d1p3/staging.ramstudioscomics.com/wp-content/plugins/simple-lightbox/includes/class.options.php on line 501
Deprecated: Use of "parent" in callables is deprecated in /home2/h0a3d1p3/staging.ramstudioscomics.com/wp-content/plugins/simple-lightbox/includes/class.options.php on line 501
Deprecated: Use of "parent" in callables is deprecated in /home2/h0a3d1p3/staging.ramstudioscomics.com/wp-content/plugins/simple-lightbox/includes/class.options.php on line 501
Deprecated: Use of "parent" in callables is deprecated in /home2/h0a3d1p3/staging.ramstudioscomics.com/wp-content/plugins/simple-lightbox/includes/class.options.php on line 501
Deprecated: Use of "parent" in callables is deprecated in /home2/h0a3d1p3/staging.ramstudioscomics.com/wp-content/plugins/simple-lightbox/includes/class.options.php on line 501
Deprecated: Use of "parent" in callables is deprecated in /home2/h0a3d1p3/staging.ramstudioscomics.com/wp-content/plugins/simple-lightbox/includes/class.options.php on line 501
Deprecated: Use of "parent" in callables is deprecated in /home2/h0a3d1p3/staging.ramstudioscomics.com/wp-content/plugins/simple-lightbox/includes/class.options.php on line 501
Deprecated: Use of "parent" in callables is deprecated in /home2/h0a3d1p3/staging.ramstudioscomics.com/wp-content/plugins/simple-lightbox/includes/class.options.php on line 501 learn to draw Archives - Ram Studios Comics
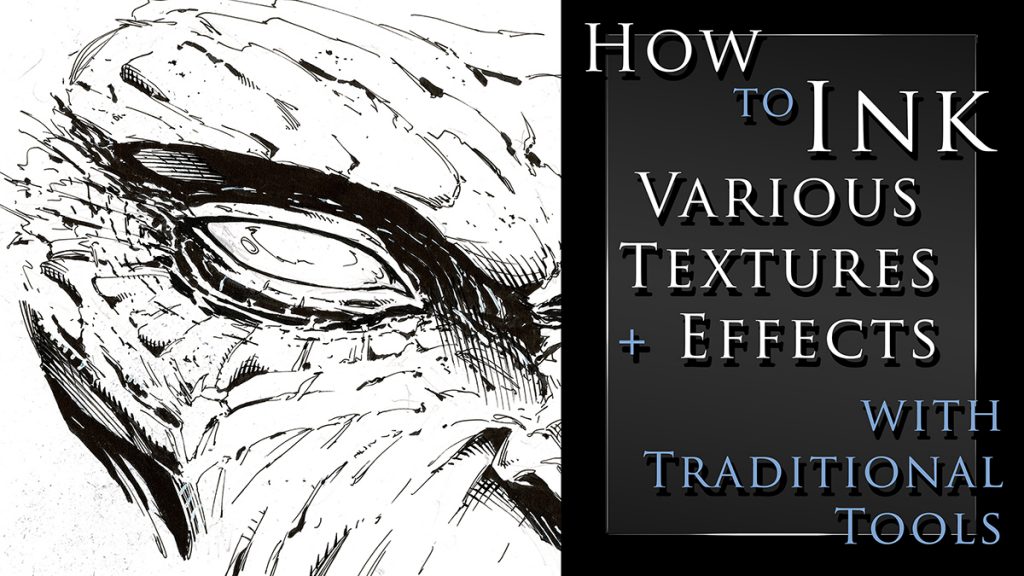
How to Ink Various Textures and Effects with Traditional Art Tools
I just created a new class on Traditional Inking Techniques. You can get it on my Gumroad or watch it on Skillshare with the links below.
In this class I will show you my methods for drawing and inking various textures with traditional tools. You will learn about line weight, textures, cross hatching, and making corrections as you work.
This class currently include 3 project files and the run time is at just over an hour. The first project is drawing and inking a monstrous face. Here we will go over the benefits or random textures and effects. Sometimes you just have to let the pen go and see what happens!
For the next project you will draw and ink a fantasy art sword. This will allow us to work on something with more structure and talk about clean lines. This is also a good opportunity to render some chrome like effects.
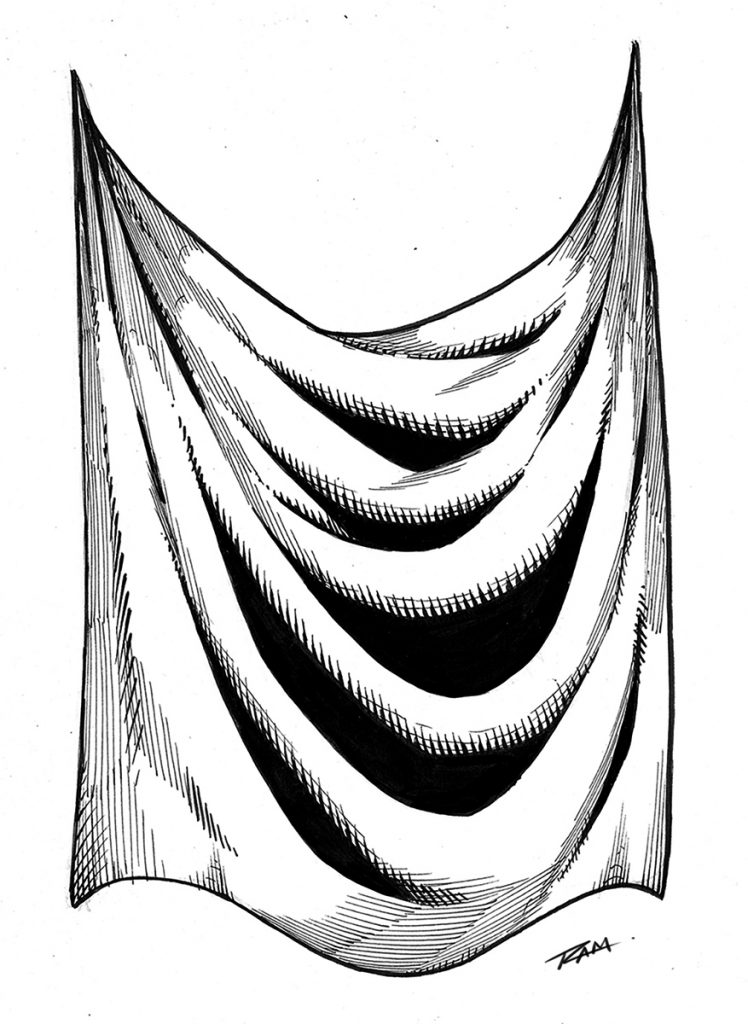
For the third project we will draw and ink some drapery. This is something we need to practice a lot and it will relate to clothing and a variety of other materials. This one is a time lapse with narrated since many of the concepts will be redundant.
You get all the art files to study and work along with. I will be adding more examples very soon but let me know if there is something you would like to see covered in future lessons.
Tools that we will be using in this class –
Strathmore 200 Series Bristol Board Smooth
Micron Pens – 01, 05
Tombow Dual Brush Pen – N15
Zebra Pen WFSS4 150
Presto Jumbo Correction Pen ( White Out )
Pentel Brush Pen Fine Point
Staedtler 2mm Lead Holder – 2H lead
Thank you for your continued support and good luck with your studies!
Happy to announce that I will be hosting my courses here now https://ram-studios-comics-art-school.teachable.com Not to worry if you are a student on the other platforms, I will still be taking care of you and adding new content. This new site will allow me to address certain needs that have come up time and time again.
For those of you that are new here, my name is Robert A. Marzullo and I have been creating online courses for over 7 years now and it has been an amazing journey. I have been able to help over 120,000 students from all over the world. I get to see their progress and offer feedback or encouragement where I can. I am extremely grateful to be doing this for a living.
I have been primarily using Udemy, Skillshare, and Gumroad to host my content. They are all great but they all have some major flaws as well. With Udemy and Skillshare I have to be careful how I communicate with the student. I cannot direct them off site for one. That can be a problem when I need to help the student but afraid to get a strike from the platform. Skillshare is pretty great overall but I can’t currently respond to students with any draw overs. Those are really helpful to show someone exactly what I mean in a response to their question.
What will I learn?
The main things you can expect to learn from this site are figure drawing, comic art, benefits of digital art programs and how to use them, traditional art techniques, creature design, and character design. I also want to help artists realize their potential at achieving success. It amazes me that so many talented people fail to achieve their goals when they have so many awesome opportunities these days.
The primary Art applications I use and teach are Clip Studio Paint, Procreate, Photoshop, and Sketchbook Pro.
Here are some of the great features of the new site –
Better lesson structure with comments + images attached to each lesson.
Live-streaming options to be help students and offer mentor ship programs.
More control for me to communicate with you properly without worrying.
Specifically designed and focused on art education.
Better overall student experience.
I will be uploading all my courses here in the next few days. I already have a couple of my most popular courses on there. Be sure to sign up for updates if you are interested in knowing more.
This should be a huge help for everyone involved. Feel free to give me any feedback you have or let me know if have any questions.
Thank you for your continued support and good luck with your art!
As artists and especially as comic artists we have to have a good understanding of human anatomy. It is not an easy task but it is definitely worth the effort. You can immediately tell when an artist spends time doing their studies of the human body. From gesture and figure drawing to countless illustrations of the complex muscles and their relationships, nothing about it is simple but it truly transforms your art into something to be desired.
I avoided these studies for far too long in my own career. Even after hearing criticism from professional artists and editors that I admired. We have all been there or will hear it at some point, “You need to work on your anatomy! It is never fun to hear a comment like that but it is the cold hard truth. If you want to be a great character artist, you need to study anatomy.
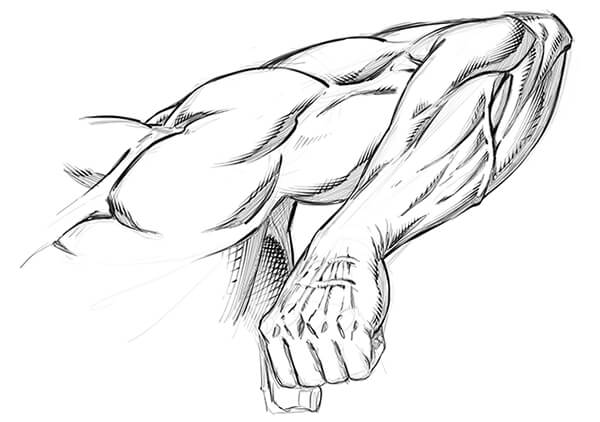
So let’s stop avoiding what we know we need to learn. I created these lessons to help simplify the anatomy and make the drawing process easier to accomplish. In this first class we will focus upon the Arm Anatomy. Here is the class introduction to let you know what you can expect to gain from it –
Welcome to my class, “Dynamic Anatomy for Artists – Drawing the Muscles of Arm.”
Dynamic Anatomy of the Arm for Artists
I am extremely excited to bring you these lessons on drawing the muscles. Learning anatomy isn’t easy but it will vastly improve your ability to draw impressive character designs and comic book superheroes.
What You Will Learn in This Class –
How to Draw the Muscles
Basic Terminology
Visual Patterns
Form + Volume
Stylizing the Work
Efficient Ways to Improve
This class is designed to simplify the process of drawing the arm anatomy. I will teach you the basic forms that I use to draw the arm from memory and you will get access to all the art files to study along with. Including diagrams with all the terminology.
Don’t beat yourself up though! Just try to improve a little each day and commit a muscle or two to memory here and there. Consistency is the most effective way to improve in my opinion. Rome wasn’t built in a day, right?! 😉
Dynamic Arm Anatomy Drawing
After you work through the anatomy breakdowns I will show you how to implement this into a few examples. We will work on these to help you transition your new skills into your own stylized version.
I am here if you have any questions and remember you can send your artwork for me to review by using my contact form here on the website. You can also submit your artwork as a project file on Skillshare as well. Next we will be covering Leg Anatomy so I hope you will join me for that class as well! 🙂
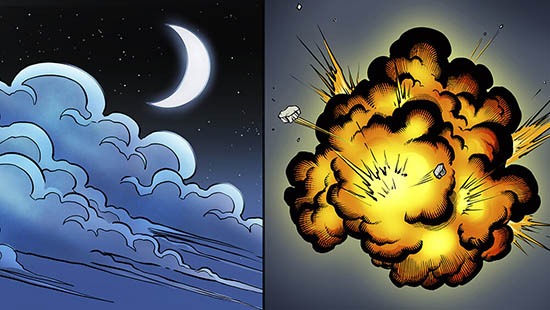
In my latest Youtube video I explain how to draw some of the basic dynamics for smoke, clouds, and explosions. These effects are widely used for comics and other forms of storytelling.
Drawing Smoke Clouds and Explosions for Comics
Check out the video below to see these two effects created!
Hopefully this post + video will help you get a bit better at drawing these elements within your own work. Remember if you don’t get it right the first time there is nothing to worry about. I didn’t either! Let’s jump in and start practicing.
Drawing Smoke
Let’s first start by drawing some basic smoke coming off a smoke stack. This is used in countless scenes in comics and is pretty much my favorite one to draw.
You can have this effect swirling in the background and make any city scene immediately look 10 times cooler. ( In my opinion of course! 😉
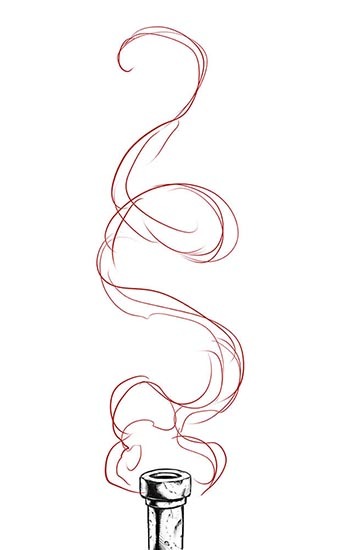
Step 1 – Start by drawing the area of influence or the basic flow of the smoke. Don’t be afraid to swirl it around a bit. I like to think about ribbons and scrolls when drawing smoke.
Drawing Smoke – Step 1
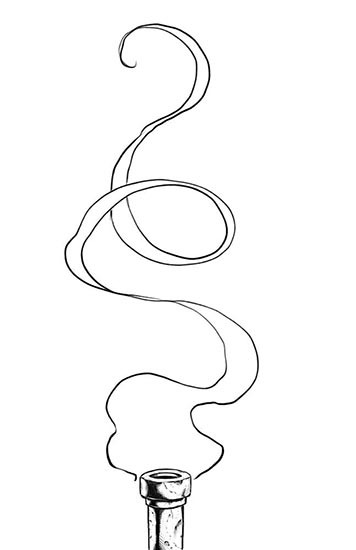
Step 2 – Erase back your construction lines or turn the opacity down on your layer. Then draw the smoke again with a bit more clarity. I like to go back and forth from thick to thin forms as the smoke rolls around. This way it looks more organic and dynamic. Use S and C curves for energy.
Drawing Smoke – Step 2
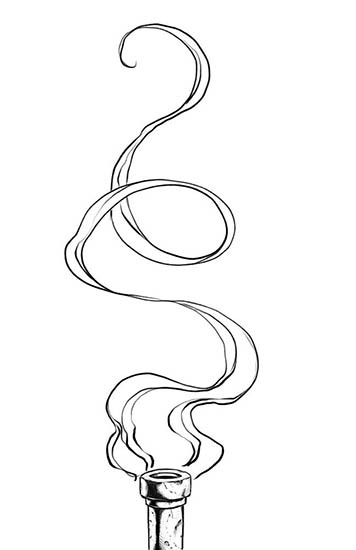
Step 3 – Draw in some of the interior lines. These can swirl around any which way you want. I like to start envisioning how the smoke might look with color at this stage. It helps me to think more dimensionally about the work as I go. You can also add in some line weight at this stage as well.
Drawing Smoke – Step 3
Next just ink and color it and voila! Comic book smoke! Just play with lots of variations and see what you can come up with. There is no right or wrong way with comic book smoke and art in general for that matter. If you’re having fun then your on the right track! 🙂
Watch my this Youtube video on the subject and get more tips and tricks on creating more effects.
I hope you enjoy the tutorials and more on the way soon!
Let me know what other topics you would like to see covered on this blog and I will do my best to answer them with a new tutorial. I love doing break downs like this and your ideas help me to focus on what to do next.
How to Draw Comic Style Art – From Sketch to Rendering
Welcome back fellow comic art enthusiasts! I have completed a new series of lessons for you on drawing in a traditional comic art style. From rough sketching to the final rendering and cross hatching stage, you will learn the process I use to create my art with good old pencil and paper.
If you are looking to learn how to draw comics in a step by step fashion then this course is meant for you!
I first walk you through my basic supplies. I show you how I use a variety of pencil leads ranging from 2H to 2B to get the look I am after. This course has multiple projects files so that you can work along with me to better understand drawing with Line, Shape, Form, and Shadow. With these fundamental ideas you can draw anything around you and translate it into your imaginative work of art!
Here are some of the things you can expect to learn in this course –
Once you have purchased this content you get all updates for free. I will be adding more lessons as I learn new techniques to share with you on drawing comic superheroes! Currently this entire course is 6 hours long.
I hope you enjoy the lessons and you can share your artwork with me here through my contact form. Good luck with your comic art and have a great day!
I wanted to share some of my findings on using silhouettes for your art. In this case I will be sharing the effect it has on character design but really this can apply to pretty much anything. It is wildly popular for concept art but can even work for other styles of art such as comics and cartooning .
So what is a silhouette? Why does it matter? A silhouette is a two-dimensional representation of the outline of an object, as a cutout or configurational drawing, uniformly filled in with black, especially a black-paper, a miniature cutout of the outlines of a person’s face in profile. Simply put, the silhouette is the outline of anything we might be looking at.
It matters because we are extremely good at spotting things based upon their silhouette. Don’t believe me? Have you ever seen Batman’s silhouette and thought it was Winnie the Pooh? Probably not likely. Also, a strong easy to read silhouette translates into a strong character design. This is one of the many reasons character designers use the power of silhouettes at the beginning of their creative process. It also allows for a fast workflow to developing ideas.
Character Design Silhouettes by Robert A. Marzullo
Try creating some basic character designs with this method. Don’t worry yourself too much about any idea of perfection. Allow yourself to make mistakes and have fun with the process. Remember, this is an exploration of ideas. Keep the process loose and energetic. Think of things like the posture and backstory of the character and less about the details. With a silhouette, it is pretty easy to keep adding details after the initial gesture is in place anyways. As you get more comfortable with the process you will start to envision more ideas right from the start.
Another great way to use this to spark your creativity is to start with one idea and then make each additional character design vastly different. This allows you to express a ton of creativity in a short amount of time. Just like doing gestures before figure drawing, this is a great way to start your character design process. These silhouettes can be saved and reused as well. You can even experiment by overlapping them to create new inventive ideas.
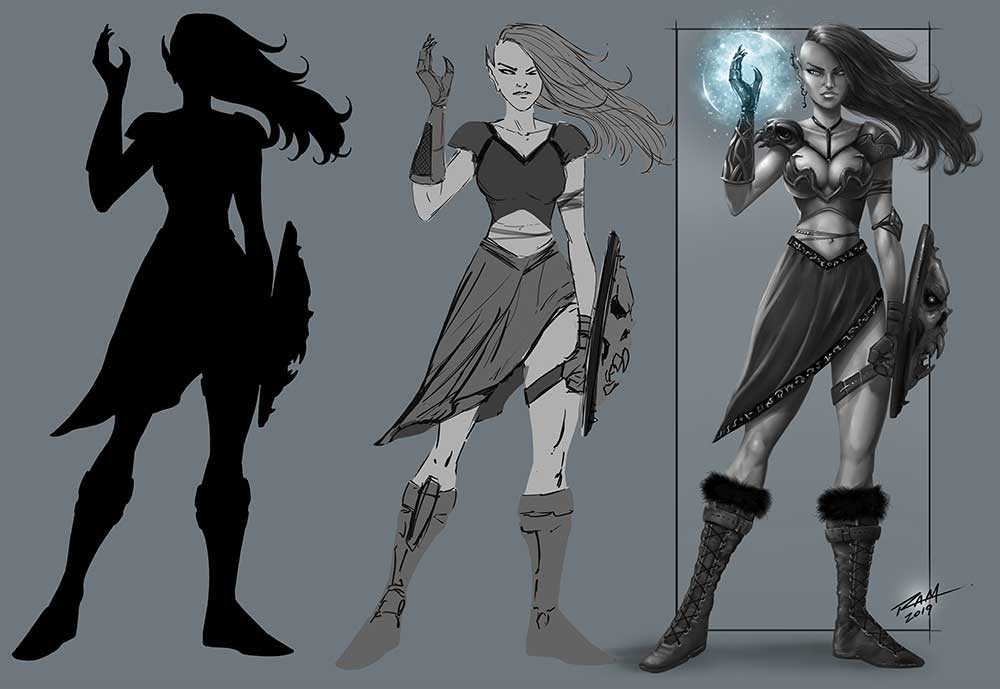
Elven Witch – Character Design – by Robert A. Marzullo
Then you can take these silhouettes and begin to refine them with values. Values are basically what you see when you convert a color image to a grayscale image. By painting in the values to your character design you can focus on the depth and form first. Unless you are a pretty confident painter, painting with colors can be distracting. It really depends upon what your strenghts are as an artist. The reason value painting is so popular in character design is that it allows the client to see the progression of the work and make changes. Whenever working with a client you want to try to create your work in even passes. This way you don’t spend all day detailing one area of your character concept only to have the client ask for an update. It will be much easier for them to read what is going on if you in smaller passes over the character design.
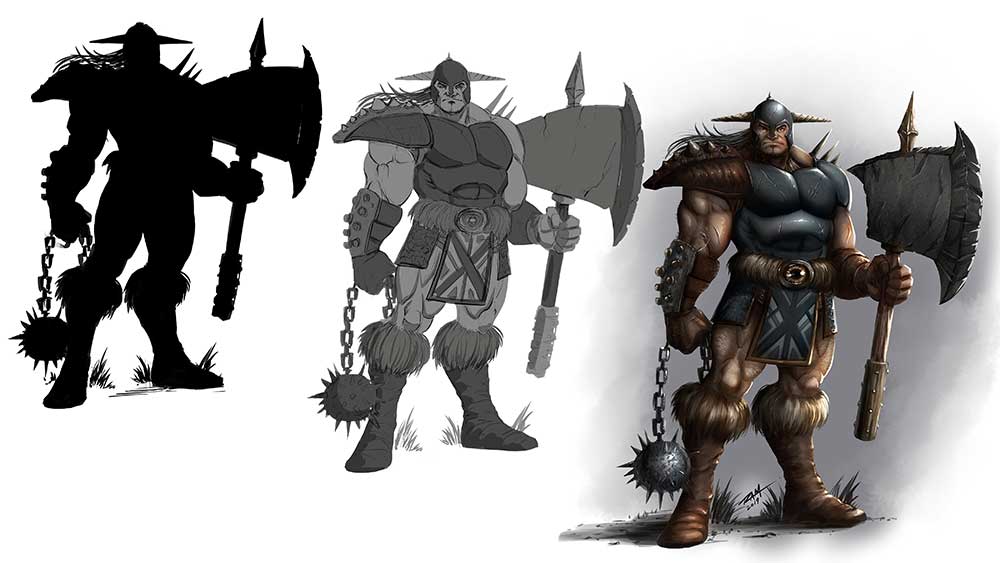
Warrior Character Design – Stages of the Work by Robert A. Marzullo
After you have worked through the entire design process you can begin to apply color. When using Clip Studio Paint or Photoshop, you can apply color with a new layer. Play with the “Blending Modes” ( PS ) or the “Combine Modes” ( CSP ) set to Color, Overlay, etc. You can apply color on just one layer but for more variety in the work, you can use a few color layers together. I will be adding information to this post so be sure to check back as I create more studies.
You can even use this same shape thought process to create dynamic comic book poses. Here is a video of me explaining that process on my Youtube channel – https://youtu.be/6MfVCC7m5R8
Thank you for viewing and let me know if you have any questions or suggestions for new content!
Welcome to my next online Course, “Drawing Amazing Backgrounds with Perspective – Step by Step.” This course will teach you how to use 1, 2, and 3 Point Perspective to create interesting and imaginative backgrounds. You will work with me as we draw an illustration for each example. This will allow you to learn not only how to use these powerful techniques but also how to create environments from imagination.
Drawing Amazing Backgrounds with Perspective
You will learn a variety of techniques to create shapes with dimension through these lessons. Such as cubes, pyramids, archways, and angles. By the end of this course, you will have a better understanding of how to draw rooms, buildings, brick walls, windows, furniture, and all with Linear Perspective!
Things we will be Focusing on in this Course
Creative Design Thinking
Expressive Line Making
Depth + Scale within Our Scenes
Mapping Out Space in Perspective
Adding Values for Portfolio or Client Work
Correcting Flaws within the Work
This course is designed to teach you how to draw detailed backgrounds step by step. You will be drawing an alleyway with one-point perspective, an interior room with two point-perspective, and a view looking up at various buildings using three-point perspective. These will each be created with a different style to give you the most versatile experience possible. It is important that you not only learn how to draw with perspective but also how to create a variety of styles with these techniques. I want my students to be able to relate this information to comics, storyboards, and animation. If you learn to be versatile as an illustrator you have a much greater chance of success. This is what I have experienced in my career and I want to share that with you! Drawing background with Linear Perspective is an extremely important asset to have as an artist. So let’s get started right now and put Perspective Art in your toolbox!
Get Lifetime access to this Full 7 Hour Course here for $10 – https://gum.co/KzRWK
I am here if you have any questions and I value your feedback!
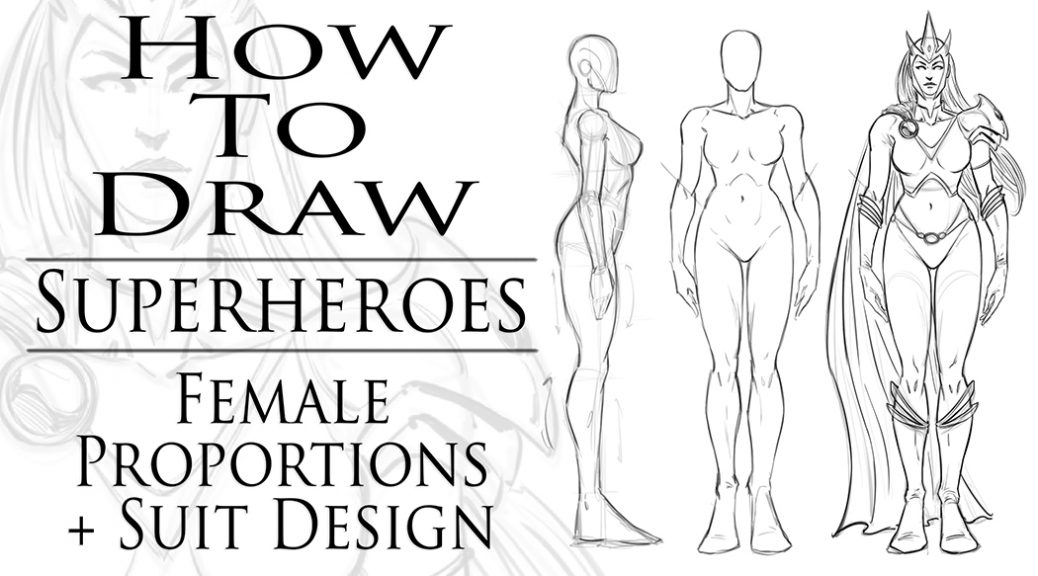
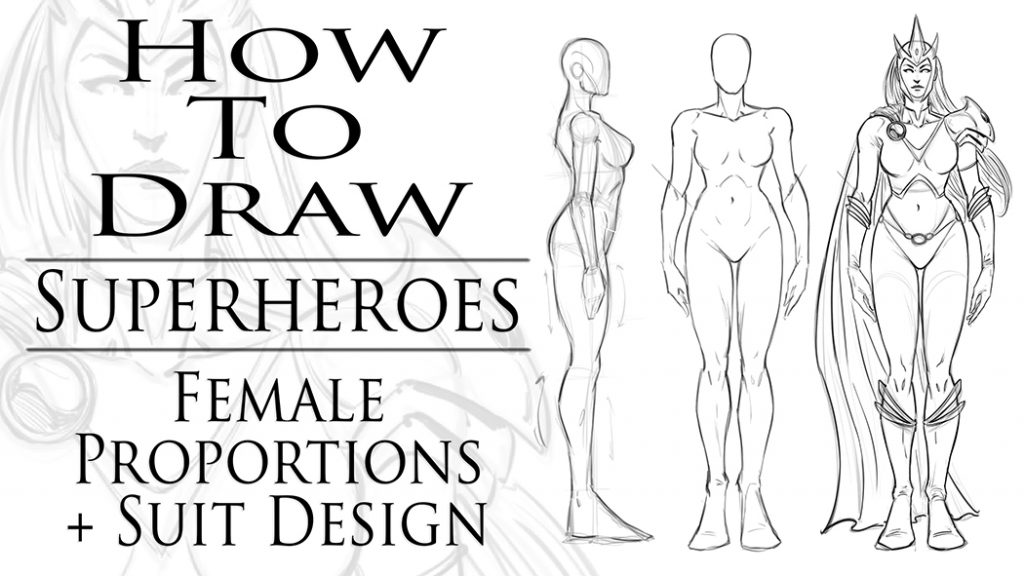
How to Draw Superheroes Female Proportions and Suit Design
I just created a new Skillshare class to add to my next course on, “How to Draw Superheroes – Start to Finish!” This will be just another part to the course that will be packed full of great information!
In this particular lesson we will cover basic proportions of the superhero female form. You will learn how I draw a turnaround of a character, then how to apply anatomy and a suit design. Breaking down the process can make it much easier to accomplish.
This can seem like a basic lesson but I assure it is a very important one to practice. Turning the character around on the page gives you a great sense on how they look from these basic angles. Then drawing them in more dynamic poses is easier to envision. Don’t worry, we will get into all that advanced stuff later, I promise!
If you want to just buy this course you can get it on my Gumroad page here. Just please keep in mind that you pay for the full course now and get the lessons as they are completed. I will be adding new lessons each week until the course is completed. https://gum.co/zgpix
By the end of this course we will cover all the various techniques I use to create comic book heroes. Things like proportions + distortions of the body, dynamic anatomy, suit designs, powers, rendering/crosshatching, shapes of shadows, action poses, foreshortening, and by the end of it we will complete a full scene creation to put all that knowledge to the test.
I hope you will join me for these lessons and I am here if you have any questions. As always keep drawing and keep having fun! 🙂
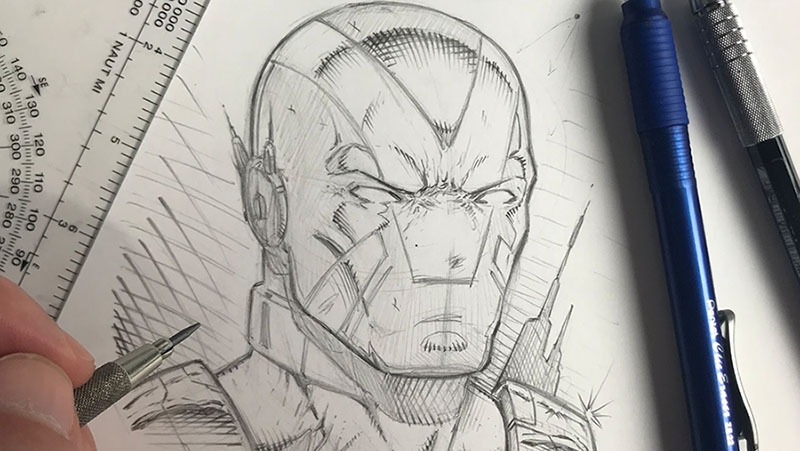
I hope all is well on your side of this crazy rock. I am having fun drawing some new fan art and I wanted to share a few things I have learned while doing so. For those of you that don’t know my process let me explain. I have been drawing comic art for over 20 years now and I used to work on good old bristol board but a few years back I decided to start working digitally. ( I was a messy inker! :>) I know people are rolling their eyes right now. Real artists use traditional tools, right? I get it, you’re in love with the feeling of real paper. I don’t blame you, I draw on paper as much as I can too. Something about it just feels…..you know…natural! I switched because I am a big fan of technology and I like to be on the forefront of it all. Plus, I really just wanted to ink digitally but then later realized the pencils were possible as well. By creating all of it digitally I was saving a lot of time. I no longer had to scan my pages which was always a pain. I know a lot of artists just don’t want to make the switch. I truly don’t blame you, to each their own I guess!
So when I started drawing digitally I bounced around to a few different drawing softwares. I quickly realized Manga Studio 4 could create full comic books as a single document and gravitated over to that. I was a little less than enticed about the drawing process on there. I was still using an Wacom Intuos 3 at the time so that was a bit of a hinderance as well. I hadn’t fully gotten used to drawing on a “lap tablet” as I like to call them. Then I switched to Sketchbook Pro for the pencils and it started to feel more natural. Once I finally upgraded to a Wacom Cintiq 22, I was like a kid in a candy store! I finally had a really nice drawing experience going on. I could pencil and ink all on this device and with the two programs I felt like I was really getting somewhere.
With each new update the programs have gotten better and better. ( For the most part. ) I still didn’t feel like I was creating to the level that I could achieve on paper though. Keep in mind, there is a learning curve with any and everything, so part of it could have been that. I truly believe you can create amazing art with anything if you put your mind and heart into it!
Almost two years ago I started hearing people talk about the new iPad Pro coming out. I was a bit skeptical at first. Maybe good for amateurs but I am a pro and I need a big fat Cintiq on my table. ( By pro I mean a starving artist of course. lol ) Upon seeing other artists work on this device I was quickly sold. I loved the fluid marks they were making. I also thought the Apple Pencil looked more comfortable to work with. Plus I really wanted to be portable with my art creation process. After taking the leap of faith I was quickly at home using the device. It was very intuitive and I was creating the style of art I like rather quickly.
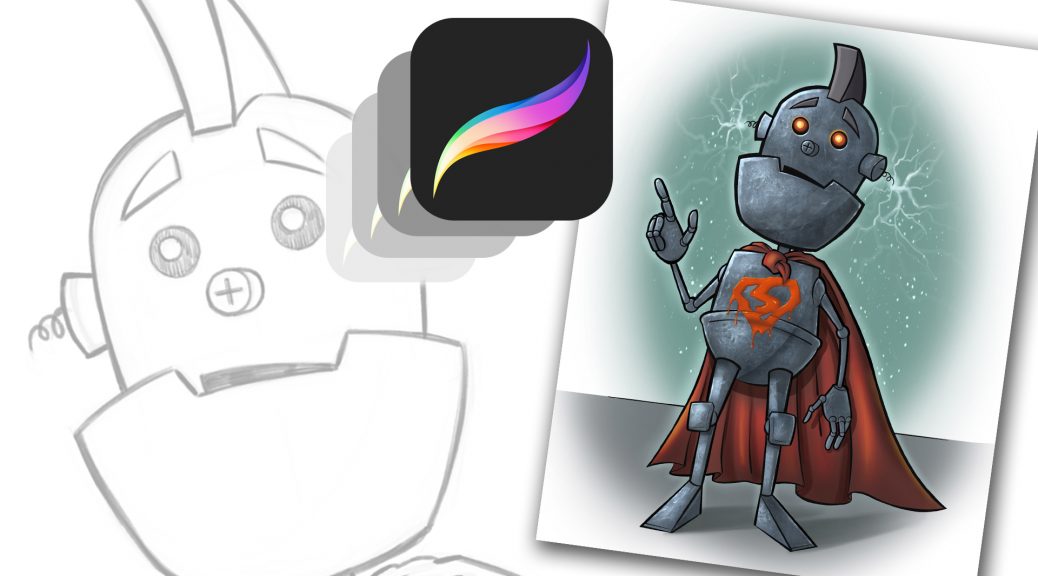
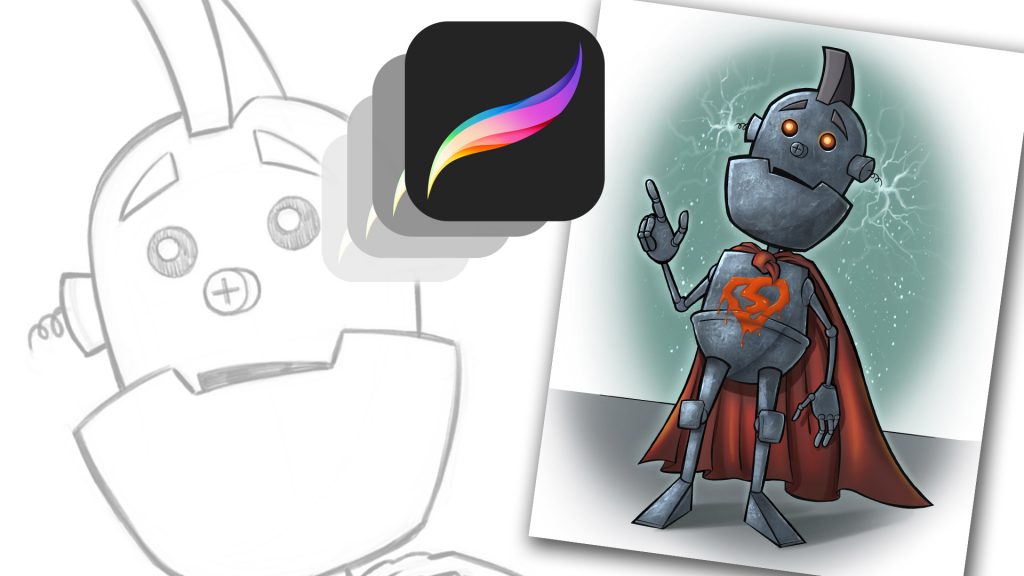
The only issues I had was not being able to use all my favorite programs. I felt a bit stuck. I really enjoy the feel of the device but was missing some great apps to take advantage of it. I even used Astropad for a short time to help bridge the gap but it didn’t fit well into my workflow. I then started using Procreate more and more. Within a few updates this app was really starting to appeal to me. Plus, it records videos and I am such a Youtube junkie these days! 🙂
The Procreate app is extremely well designed. It moves quickly and the interfaces is so streamline you will forget it is there. The brush engine is nothing short of amazing and it has the most natural drawing experience I have found thus far. The Venom art above was drawn in this app. About 90 percent of my work is done there now. I still jump over to my Cintiq when I need dual monitors and have to get some multi-tasking done but I quickly jump back over to my iPad Pro and Procreate combo to knock out some sketches or comic art.
So I just want everyone that reads this to know that the iPad Pro and Procreate is a VERY solid solution to creating professional art on the move. Great battery life and stable as can be! I am here if you have any questions I can help with and if you want to learn more about how I use these two together you can check out my Udemy course here – https://www.udemy.com/procreate-like-a-pro-create-awesome-digital-art-on-an-ipad/?couponCode=RAMCOMICSPOST101
Good luck with your art and thanks for your support! 🙂
Procreate Like a Pro: Create Awesome Digital Art on an iPad
Procreate Like a Pro: Create Awesome Digital Art on an iPad
In this course you will learn about the app in two fundamental ways. You will watch me explain the interface while demonstrating the hand gestures that are used to complete various tasks. You will learn how to import and export images, flip the canvas, share the work in various formats, export video, setup the perspective tools, and adjust the interface to your preference.
Want to Learn How to Draw on an iPad?
In the next section I will take you through a complete illustration from start to finish. This will allow you to see and work through the process of creating the illustration and commit it to memory. You will learn about the brushes, layers, blending modes, lock transparency, selection tools, color adjustments, and general tips and tricks on painting various effects with texture.
By the end of this course you will have created a fun and informative art project. I would love to see what come up with and I would be happy to give you any feedback I can. Just share the work in the Q+A Section when you are done!
An Educational Resource for Comic Art Creators and Digital Painters.
Deprecated: trim(): Passing null to parameter #1 ($string) of type string is deprecated in /home2/h0a3d1p3/staging.ramstudioscomics.com/wp-content/plugins/simple-lightbox/includes/class.utilities.php on line 545