Tag Archives: illustration

Drawing Comic Style Art in Procreate – On the iPad Pro

Venom Comic Art by RAM

Hello Everyone!

I hope all is well on your side of this crazy rock. I am having fun drawing some new fan art and I wanted to share a few things I have learned while doing so.  For those of you that don’t know my process let me explain.  I have been drawing comic art for over 20 years now and I used to work on good old bristol board but a few years back I decided to start working digitally. ( I was a messy inker! :>)  I know people are rolling their eyes right now.  Real artists use traditional tools, right?  I get it, you’re in love with the feeling of real paper.  I don’t blame you, I draw on paper as much as I can too.  Something about it just feels…..you know…natural!  I switched because I am a big fan of technology and I like to be on the forefront  of it all.  Plus, I really just wanted to ink digitally but then later realized the pencils were possible as well.  By creating all of it digitally I was saving a lot of time.  I no longer had to scan my pages which was always a pain.  I know a lot of artists just don’t want to make the switch.  I truly don’t blame you, to each their own I guess!

So when I started drawing digitally I bounced around to a few different drawing softwares.  I quickly realized Manga Studio 4 could create full comic books as a single document and gravitated over to that.  I was a little less than enticed about the drawing process on there.  I was still using an  Wacom Intuos 3 at the time so that was a bit of a hinderance as well.  I hadn’t fully gotten used to drawing on a “lap tablet” as I like to call them.  Then I switched to Sketchbook Pro for the pencils and it started to feel more natural.  Once I finally upgraded to a Wacom Cintiq 22, I was like a kid in a candy store!  I finally had a really nice drawing experience going on.  I could pencil and ink all on this device and with the two programs I felt like I was really getting somewhere.

With each new update the programs have gotten better and better. ( For the most part. ) I still didn’t feel like I was creating to the level that I could achieve on paper though.  Keep in mind, there is a learning curve with any and everything, so part of it could have been that.  I truly believe you can create amazing art with anything if you put your mind and heart into it!

Almost two years ago I started hearing people talk about the new iPad Pro coming out.  I was a bit skeptical at first.  Maybe good for amateurs but I am a pro and I need a big fat Cintiq on my table.  ( By pro I mean a starving artist of course. lol )  Upon seeing other artists work on this device I was quickly sold.  I loved the fluid marks they were making.  I also thought the Apple Pencil looked more comfortable to work with.  Plus I really wanted to be portable with my art creation process.  After taking the leap of faith I was quickly at home using the device.  It was very intuitive and I was creating the style of art I like rather quickly.

The only issues I had was not being able to use all my favorite programs.  I felt a bit stuck.  I really enjoy the feel of the device but was missing some great apps to take advantage of it.  I even used Astropad for a short time to help bridge the gap but it didn’t fit well into my workflow.  I then started using Procreate more and more.  Within a few updates this app was really starting to appeal to me.  Plus, it records videos and I am such a Youtube junkie these days! 🙂

You can check out my channel here by the way – http://www.youtube.com/c/robertmarzullo

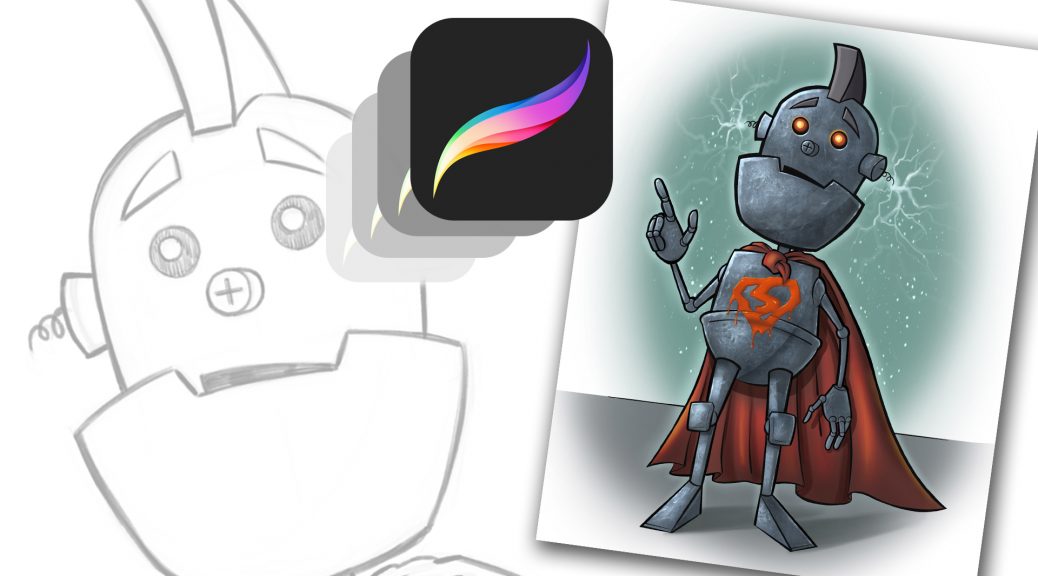
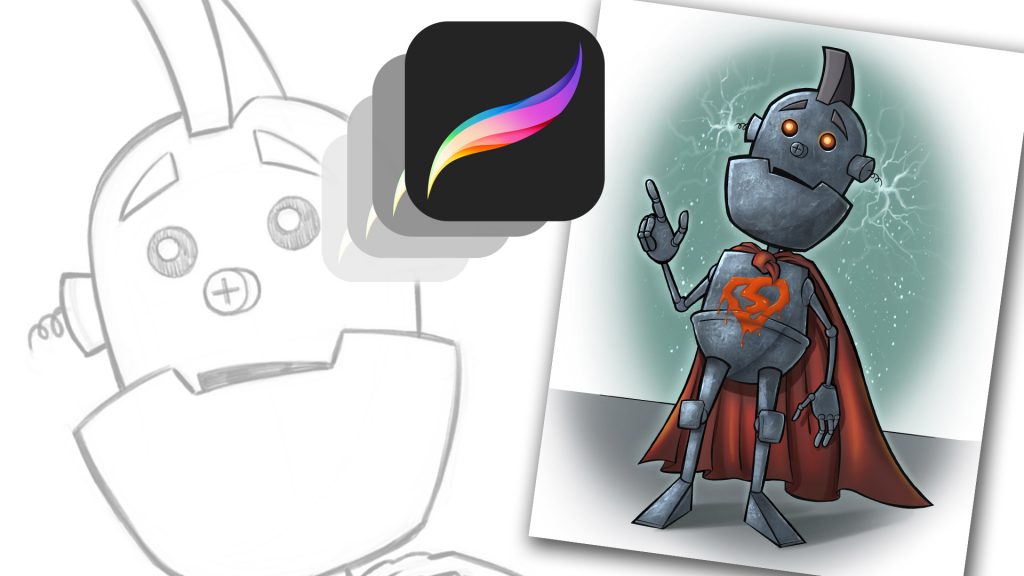
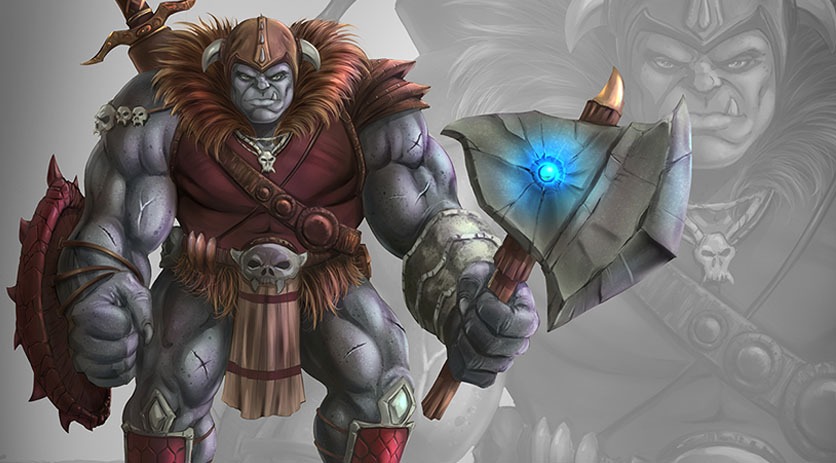
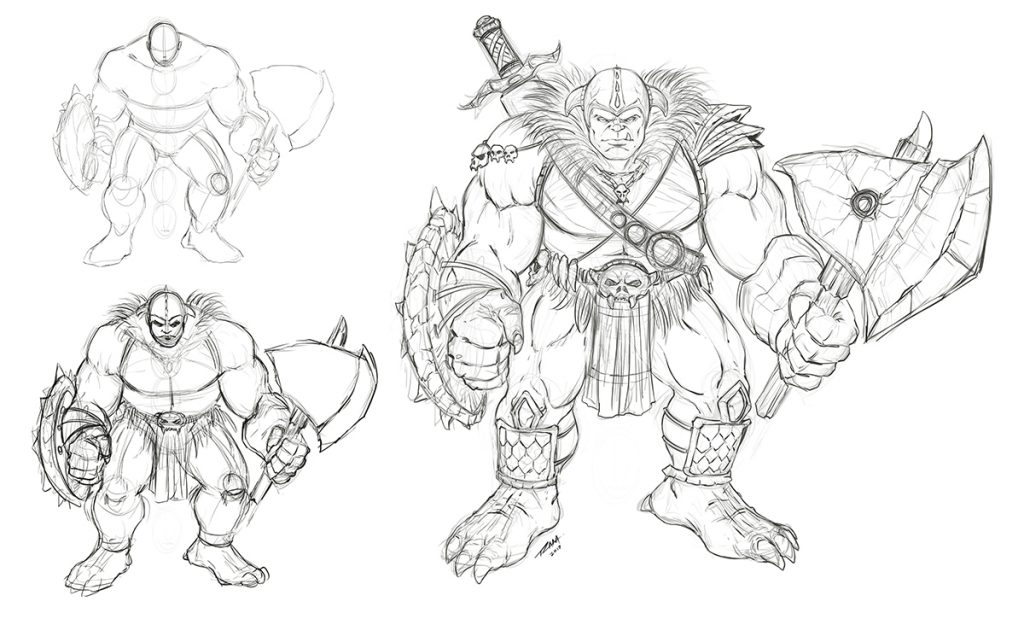
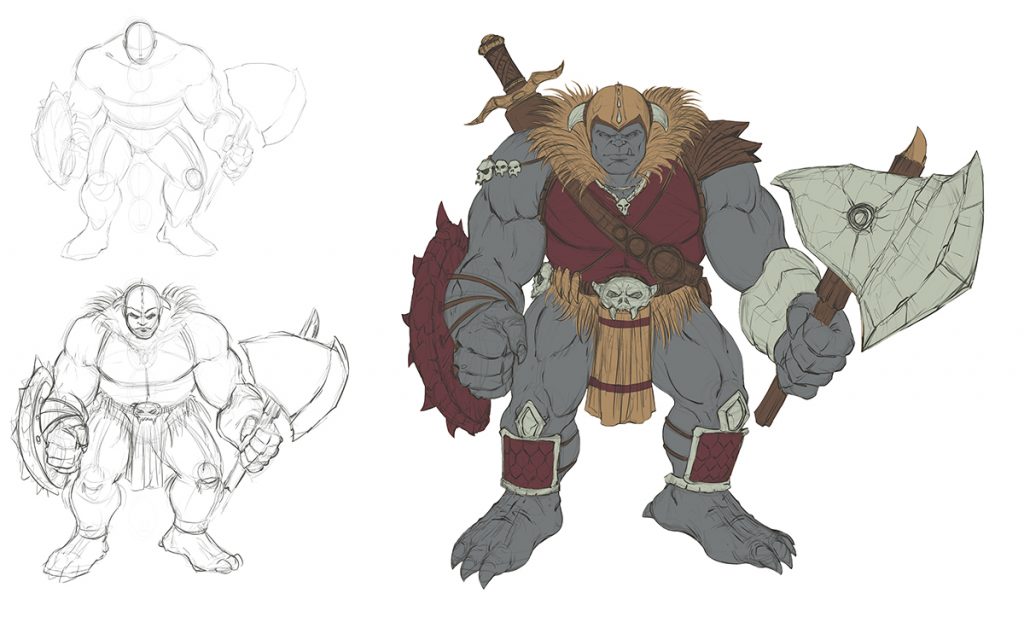
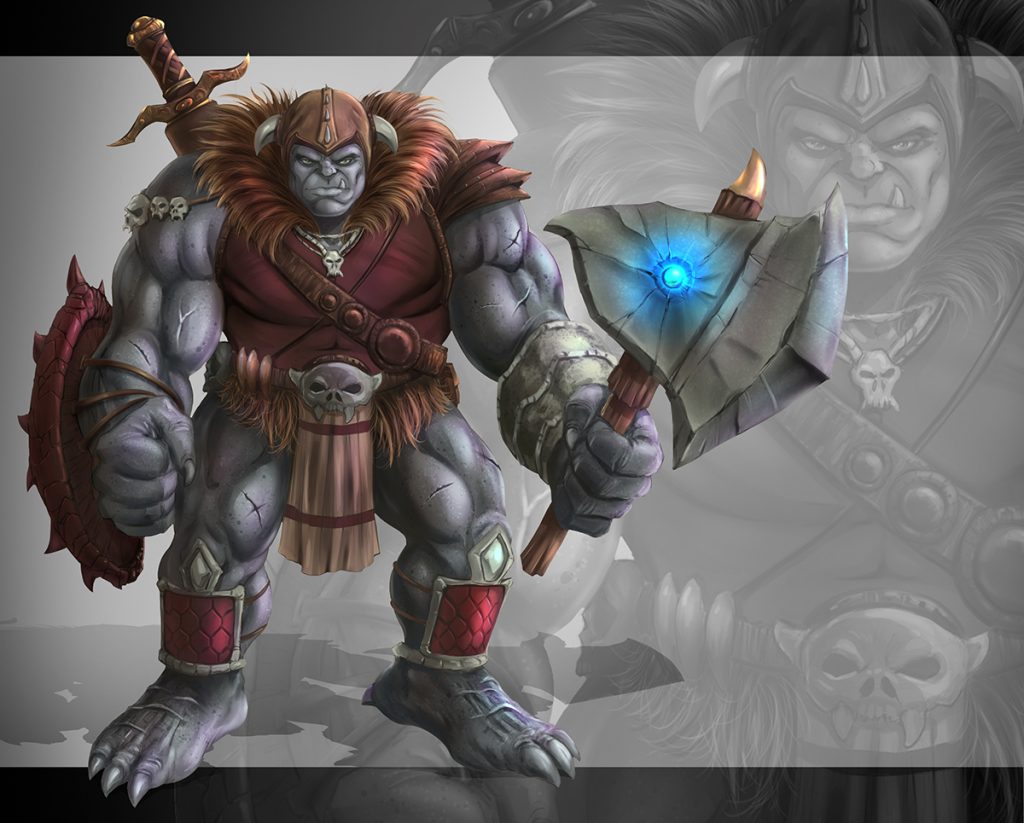
The Procreate app is extremely well designed.  It moves quickly and the interfaces is so streamline you will forget it is there.  The brush engine is nothing short of amazing and it has the most natural drawing experience I have found thus far.  The Venom art above was drawn in this app.  About 90 percent of my work is done there now.  I still jump over to my Cintiq when I need dual monitors and have to get some multi-tasking done but I quickly jump back over to my iPad Pro and Procreate combo to knock out some sketches or comic art.

So I just want everyone that reads this to know that the iPad Pro and Procreate is a VERY solid solution to creating professional art on the move.  Great battery life and stable as can be!  I am here if you have any questions I can help with and if you want to learn more about how I use these two together you can check out my Udemy course here – https://www.udemy.com/procreate-like-a-pro-create-awesome-digital-art-on-an-ipad/?couponCode=RAMCOMICSPOST101

Good luck with your art and thanks for your support! 🙂

Robert A. Marzullo

Ram Studios Comics


Why It’s Important to Thumbnail the Artwork First

Spider-man and Spider-Gwen

I often get into a bad habit of drawing whatever comes to mind.  I mean to say, when I start an image I don’t always know exactly where I want it to end up.  When I see myself do this too many times I get back to the basics to fix it.  That is when I go back to drawing thumbnails like a good little artist should! 😉

Thumbnailing  helps you to know where the artwork should end up. It is a way to establish a set of ideas without wasting a huge amount of time.  Another way to say it is just “rough sketching” but I think thumbnails are the preferred terminology in comics.

You can work out things like poses, composition, camera angles, movement, energy of the shot, and shapes of shadows.  In my opinion, you want to get as much information about the end result as you can within about 2-5 minutes of sketching.  This also sparks creativity immensely!

After rough sketching about 5 thumbnails I am usually pretty set to go on my drawing but hey at 2 minutes long no big deal if you need to create a few more, right?

If you want to see a video of this drawing from the thumbnail sketch to the finished pencils  you can watch it here on my Youtube channel –

Let me know what you think of it and as always, Keep Drawing and Keep Having Fun! 🙂

Robert A. Marzullo

Ram Studios Comics


Procreate Like a Pro: Create Awesome Digital Art on an iPad – Udemy

Procreate Like a Pro: Create Awesome Digital Art on an iPad

Procreate Like a Pro: Create Awesome Digital Art on an iPad

In this course you will learn about the app in two fundamental ways. You will watch me explain the interface while demonstrating the hand gestures that are used to complete various tasks. You will learn how to import and export images, flip the canvas, share the  work in various formats, export video, setup the perspective tools, and adjust the interface to your preference.

Want to Learn How to Draw on an iPad?

In the next section I will take you through a complete illustration from start to finish. This will allow you to see and work through the process of creating the illustration and commit it to memory. You will learn about the brushes, layers, blending modes, lock transparency, selection tools, color adjustments, and general tips and tricks on painting various effects with texture.

By the end of this course you will have created a fun and informative art project. I would love to see what come up with and I would be happy to give you any feedback I can. Just share the work in the Q+A Section when you are done!

Get this course here  – https://www.udemy.com/procreate-like-a-pro-create-awesome-digital-art-on-an-ipad/?couponCode=RAMSTDIOSCOMICS101

Promo Video –

Robert A. Marzullo

Ram Studios Comics

How to Draw Comic Style Heads – Step by Step – From Any Angle

How to Draw Comic Style Heads From Any Angle
How to Draw Comic Style Heads From Any Angle by Robert A. Marzullo

How to Draw Comic Style Heads – Step by Step – From Any Angle

In this Course you will learn how to draw heads from a variety of angles and different styles. You will learn how to break down the head into thirds with the “Adrew Loomis” method. This will make turning the head on the page much easier to accomplish. You will also learn techniques for mapping out the facial features of your character. We cover front, side, upward angle, downward angle, with both male and female faces.

You will also learn how to draw the heads of your characters with a less structured approach. This comes with practice but it can be very fun and expressive to do.

This course is 25 Lectures and the Run Time is 4hrs 14min.
You get all the Art Files in a single PDF Document at 300dpi to work along with.

NOTE – In this how to draw comics style heads course I reference other lessons that are available on my Gumroad or Skillshare. I talk about the lessons that teach you about drawing eyes, noses, mouths, etc. They are not part of this course but may help you if you need work on those specific areas.

Next the Project File!!

I would love your feedback on these how to draw lessons and I would also like to see your work! Complete the project file that I talk about in the Promo Video. Feel free to message me through Gumroad or Tag me in a post using Twitter or Instagram.
Instagram – @robert_marzullo
Twitter – @RobertMarzullo

Watch the Promo Video here – https://youtu.be/aS_JcZNpmVQ

Check out the full course here –

https://ram-studios-comics-art-school.teachable.com/p/how-to-draw-heads-step-by-step-from-any-angle/?product_id=2447770&coupon_code=RAMSTUDIOSCOMICS777

I hope you find this course to be helpful and good luck with your studies! 🙂

Sincerely,

Robert A. Marzullo
Ram Studios Comics
www.staging.ramstudioscomics.com

How to Improve Your Creature Design Drawing – Step by Step – Course

Creature Design Class

How to Improve Your Creature Design Drawing – Step by Step

In this course you will learn how to draw a variety of creature concepts. I will walk you through all the techniques that I use to draw imaginative creatures every day. This course is good for traditional and digital artists.

You will learn how to draw various studies to improve your knowledge and gain inspiration. We will cover break downs of specific areas in the creature anatomy to better understand how their bodies work.

You will learn to draw and study the spine since it is the foundation of almost any creature you will draw. I will walk you through creating lots of different concepts in this course.

Here is a break down of the Lessons that are currently available –

L1 – The Spine Says it All – In this lesson you will learn why studying the spine is so important and follow along with me as I illustrate a few examples.(Run Time – 13:09)

L2 – Thumbnailing the Concepts – In this lesson we will thumbnail 11 different concepts. This is an integral part of the design process. By keeping the ideas loose and the sketches quick ( 5-6 Minutes ) you can express a lot of concepts to work from. (Run Time – 8:54)

L3 – The Brain Box – In this lesson you will learn how to draw various heads for our creatures. We will talk about some of the differences that define predators and prey. (Run Time – 9:19)

L4 – Creating Variations in Your Concepts – In this lesson we will draw 6 creature designs but focus on making each one very different from the previous example. This can be a great way to stretch the imagination. (Run Time – 12:00)

L5 – Animal Leg Studies – It is important to study various parts of animal anatomy to gain perspective on your creature designs. Here we will draw 3 examples from animals and adjust them slightly to look more imaginative. (Run Time – 7:57)

L6 – Merging Concepts Together – In this lesson you will work with me as I draw 6 different creature limbs. Each will have at least 2 various traits mixed together to create the design. (Run Time – 11:04)

L7 – Adjusting Proportions – In this lesson you will learn how to create a creature concept and then adjust the proportions to make a very different version of that same creature. This can be another very useful exercise in developing a unique creature design. (Run Time – 11:03)

L8 – Project Ogre Thumbnails – In this lesson you will learn how to work from a script like a real pro does. This is a fun and important exercise to do so let’s get to it. We will start by drawing out our thumbnails to this concept. (Run Time – 17:02)

L9 – Cleaning up the Concept – In this lesson we will draw one more thumbnail and make our decision on what to keep and what to pitch. We will then start to clean up our sketch. (Run Time – 17:08)

L10 – Refining the Drawing – Now the heavy lifting has been done and we will start to refine the line work and make it pretty for the client or our portfolio…or both! (Run Time – 18:50)

More lessons are on the way and I am here if you have any questions or feedback for me. You also get access to all of these art files to study from.

Get Lifetime Access to this Course here – https://ram-studios-comics-art-school.teachable.com/p/how-to-improve-your-creature-design-drawings-step-by-step

Get a glimpse into this course here on my Youtube channel – https://youtu.be/FVDKCH8IwP4

Robert A. Marzullo                                                                                                      Ram Studios Comics

Learn to Draw and Paint an Ogre Concept in Manga Studio 5 / Clip Studio Paint

Learn to Draw and Paint an Ogre Concept in Manga Studio 5 / Clip Studio Paint

___________________________________________________________________________

Welcome back everyone! I have some new course content to share with you today. It is on drawing and painting an Ogre character concept in Manga Studio 5 / Clip Studio Paint. In this course I will walk you through the entire process step by step while explaining the tools I use within this program.

Ogre Concept Art Sketch by RAM

Drawing and Refining the Concept

We will first start with the rough sketch where you will learn how to define the overall proportions of this creature design. You will learn a series of techniques to adjust and add to the existing line work to get the desired look of the character. Then I will show you how to clean up the line work and get it ready for the digital painting process.

Ogre Concept Art Flats by RAM

Adding in the Flats and Separating the Work

In the next lessons we will go over how to add in the flat colors while segmenting the work. This will help us visualize the direction we are heading and aid in the painting process later on. Segmenting the work on complex characters or scenes can help you to retain a solid feel to the artwork until you build the confidence to no longer need these steps. Some artists use this method on every piece of artwork they create and others begin to use less and less layers over time as their skills with editing become more effective.  It is for you to decide what works best in your workflow.

Ogre Concept Art Painted by RAM

After we have put all the foundational information in place we will begin to add in our digital painting effects. We will be using some custom brushes but not many. I have puposely created this artwork with a minimal set of brushes to show you that it can be done effectively with just a few good brushes. Amazing paintings can be done with just one brush but you will spend more time creating the effects you might be looking for. All the brushes I have used will be included with this course.

___________________________________________________________________________

This course consists of 19 step by step narrated lessons showing you how to draw and paint this character design. You get the art files and custom brushes to work along with. The total course is

4 Hours 29 Minutes long.

___________________________________________________________________________

So I am excited to know what you think and if you decide to take this course I hope you gain a lot of valuable techniques for your workflow. I am here if you have any questions!

You can get this entire Course on my Gumroad here – https://gum.co/lYFX

Robert A. Marzullo

Ram Studios Comics