Tag Archives: drawing

What screen protector do I use for drawing on the iPad Pro?

Hello fellow Digital Artists!

Choosing the Right Screen Protector for Drawing on Your iPad Pro can be tricky and there are a few things to consider. The main things are protection from damage, a better surface to draw or paint on, and protection for your eyes. We will primarily focus on the drawing aspect today.

So you have an iPad Pro and Apple Pencil and you’re not digging the slick screen right? Been there and done that and I want to share what I have learned with you.

Now before we get started, please keep in mind that we all have different needs so this will not apply to everyone the same. Hopefully my experience will save a few of you from timely and frustrating mistakes. Ultimately it may take some trial and error to find what works for your specific needs.

First let me explain what I have used in the past and what the Pros and Cons have been. I purchased the first Genenteration iPad Pro and Apple Pencil 2015 version. ( Look for the big home button on your device before making your purchase! ) It still works great by the way. I started drawing on the screen and although it didn’t feel natural it was still amazing to work on. I knew from working on the Intuos tablets that digital art just isn’t exactly the same and it takes time to adjust to any new device.

After a while I started to look for the screen protectors that would also give me a more natural drawing experience and save it from any accidental damage of course. I did a ton of research online and landed on the Tech Armor Antiglare protector. You can view it here on Amazon – https://amzn.to/3kGpwI3

Tech Armor Antiglare is my 2nd Favorite Choice!

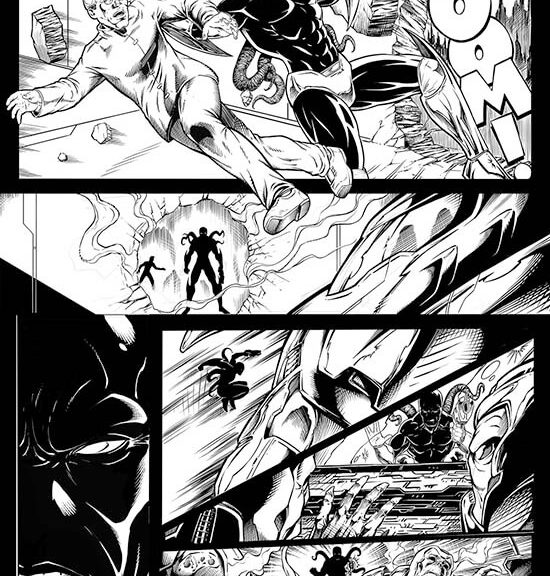
The Tech Armor Antiglare Protector is still my number 2 on the list. It slows down the Apple Pencil slide and softens up the feeling of the hard glass screen. For me that was a big game changer. I was finally able to draw on the iPad Pro more naturally and stay in the moment of creating the art that I love to create. Comics baby! 🙂

Over time, many new screen protentors hit the market and a lot of them boast things like – Paper Like, the feeling of Paper, etc. I didn’t worry too much about it but as mine started to age I began to look around. I wanted to try one of the Paper Like products and here is the one that caught my eye based upon the reviews – https://amzn.to/2IIBWSA

Paper-Like…More like Sand Paper-Like!

I actually enjoyed this for all of about 2 days. It started to get very annoying very quickly. Not only does your 2 finger pinch and zoom not work as well, you can start to see an effect on the Apple Pencil nib. ( Not cheap to replace those little guys! ). So I started to think the Paper-Like feeling just wasn’t worth it. Besides it really is too coarse in my opinion. More like a fine grit sand paper. So I ripped it off and went back to my Tech Armor.

I still felt like I needed try something else. Don’t get me wrong the Tech Armor antiglare is nice but it stills has a bit too much slide for me. So I decided to keep trying. I then tried the iCarez Antiglare protector. You can view it here on Amazon – https://amzn.to/38PEZTE

iCarez Antiglare Screen Protector

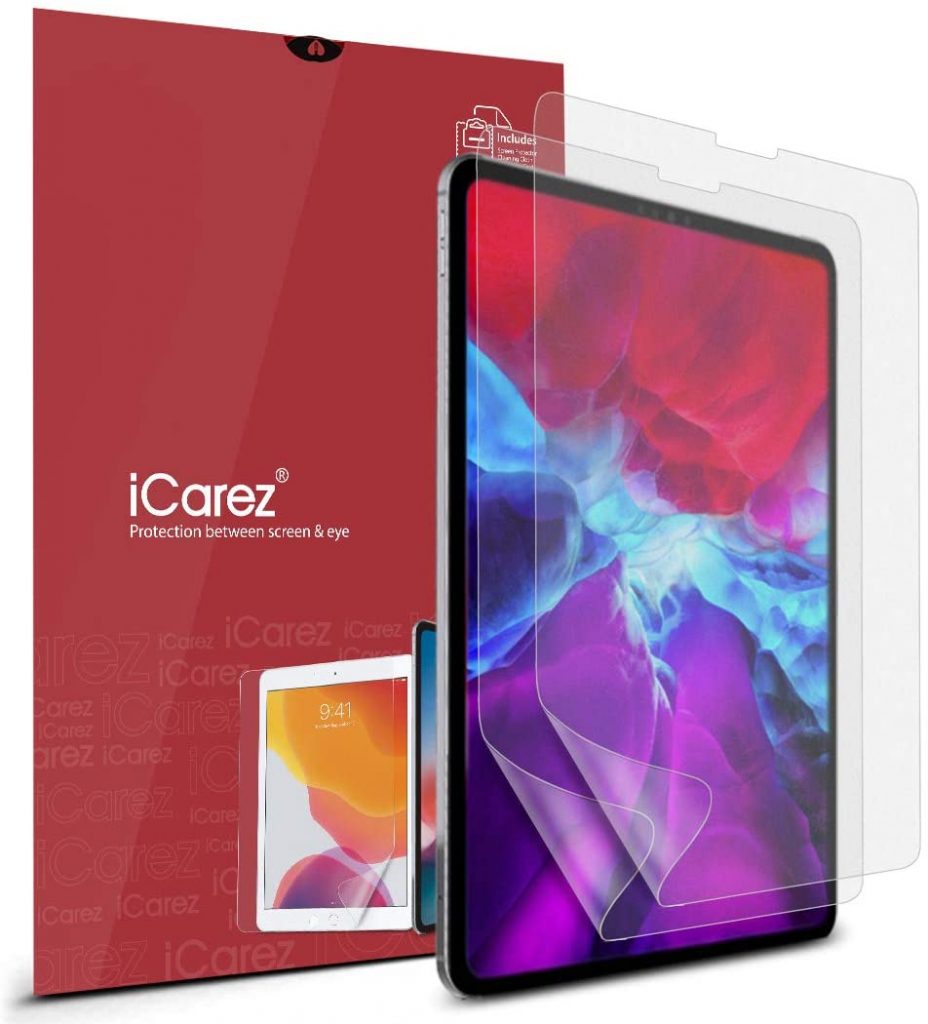
Not only did I like this one more but it was also cheaper. It slows down the Apple Pencil a bit more but without the sand paper like feeling. I have been using this one for weeks now and it doesn’t negatively impact the nibs either. I am back to drawing on my device and not getting distracted about sliding around on the slick screen and that keeps me creating, which I love!

Keep in mind that all of these protectors will knock back the clarity of the screen. That isn’t as big of a deal for me since I typically only draw comic art but your needs may vary. To me its minimal on the Tech-Armor and the iCarez but be sure to read the reviews about what applies to your type of work. Another tip is to find someone who creates a similar style to yours and find what works for them.

Keeping the Surface Clean is a Must!

You also want to be aware of your own skin oils. Sounds gross right? Your hand is going to leave oils on the screen protector so clean it with a microfiber and sometimes with a small amount of water and or light cleaner. Nothing too aggressive so it doesn’t destroy the finish. By keeping the oils off the screen protector you will retain the optimal feeling for drawing. Just my two cents of course, you may prefer an oily screen…I don’t know you very well. lol

Remember, we all have different levels of sensitivity and needs when drawing and painting. So do your research and you may need to try one or two options before landing on your preferred choice. It is worth it when you find what you looking for since eliminating those irritations will keep you in the creative moment.

Good luck to you and thank you for stopping by! 😉

Robert A. Marzullo

Ram Studios Comics

For more art tips check out my Youtube channel here – http://www.youtube.com/c/robertmarzullo

Drawing for Comics – The stages of comic art

In this post I want to talk a bit about the primary stages of the drawing process for comics. There are obviously a lot of different ways to create stunning art for comics but the main ones that come to mind are the rough sketch, the pencils or refined lines, and the inks!

Most artists develop the work in this way but not every artist goes about it the same. Some comic artists can draw a clean image over a very loose sketch and sometimes no sketch at all. Yes, they do exist and yes, I do want to Karate kick them in the face. Just kidding…I don’t know Karate. 😂

People like me at least need to refine things a bit more to stay consistent with my end result. Some artists might need to draw things over and over again to get what they want. The point is, whatever works for you is, “The Right Way!” Over time we all get better at skipping steps that once were essential to the goal. It’s kind of the magic of art really. It’s also why it’s so powerful when you see the work of an artist you admire. You are witnessing the collective ability that they have acquired over years and years of hard work. That is the reason they make it appear so easy. Drawing for comics isn’t an overnight process, it’s a journey so be ready.

Step 1 – The Rough Sketch

I take my time with the initial sketch. Let me be specific, I take as much time in the thumbnail stage as it takes to know I have a good concept to work from. I purposely draw them loose and fast. I know, I just contradicted myself. I draw them quickly because they are small and very little detail but I also take my time to draw as many as I need to get the composition right. Not getting caught up in the details too soon.

Drawing for comics is a tricky thing. We tend to overthink it or put details where they don’t belong or will not even get noticed. Try to think big to small as you layout your scene. If the big shapes make sense then all those amazing details will just be icing on the cake.

J. Jonah Jameson from Spider-man “Get me Parker!!”

Drawing for comics is hard work but it gets much easier when you plan it out!

Step 2 – Refining the Pencils

Now I move to exploring my composition. Refining the lines and seeing if I can realize my original vision. The good news is if you work through the rough sketch properly this part is much easier. If you fail to put in the necessary ground work then you have to work harder at this stage. Some artists can envision things a bit better but if you can’t just double check you initial sketch. Check the perspective, proportions, composition, and gesture. Chances are if those things are working this stage will be much more fun!

Tighten up the work and add in the details but not everywhere. You have to have negative space for the viewers eye to rest. Cluttering up every square inch of the page can actually hurt the scene. Use a combination of angles and curves to explain the forms. Too much of one or the other can leave the art feeling too stiff or too soft. Same rules apply to texture. Some surfaces need to look shiny, some need to look gritty. Balancing out the contrast while keeping your focal point In mind is the key.

Step 3 – Inking the Work

Now you get to put those pretty solid lines everywhere. This is where the real commitment comes in. I like to think about this part as making the art feel solid but not so much that it looks lifeless. Not always easy to do, for me anyways. Depending upon your style, rendering can make things appear overly stiff. Just do your best to remember that initial concept. That is one of the reason I like to save the incremental steps as I work. I can look back and see where I may have lost the initial energy of the thumbnail sketch.

I also think that when your inking the work you should experiment with different levels of shadows and cross-hatching.

Some styles work better with less and the opposite can be true too of course. Another thing I like to pay special attention to is the time to add all those glorious little details.

As I mentioned before, think like a painter does, large to small. Make sure everything works with the bigger shapes and then render in the tighter refined lines. We can get caught up in the details that no one ever really sees. Plus, we are trying to draw comics here. Waste too much time and we miss our deadline and no one wants that!

In what ways do you stage your work or break things down. Be sure to comment below and let others know how you draw for comics. We all learn and grow together.

I hope you find this post helpful and be sure to share the content. Good luck with your art and remember to have fun along the way! 🙂

-Robert

Do You Want to Learn more? Check out my Art Courses herehttps://ram-studios-comics-art-school.teachable.com

You can sign up for my free course on The Importance of Thumbnail Sketchinghttps://ram-studios-comics-art-school.teachable.com/p/the-benefits-of-drawing-with-basic-forms-and-thumbnail-sketches/?product_id=2474109&coupon_code=RAMSITEDRAWFORCOMICS

Digital art for Beginners – unleash your creativity

Digital Art for Beginners

Hello Artists!

I have just released my course, “Digital Art for Beginners.” This is something I have been working on for some time. If you follow my work then you already know most of everything I create these days is done with digital tools and programs. I have been working with digital software for over 20 years and drawing tablets for over a decade. So I felt it was time to share everything that I know about Digital Art production.

This course is designed to help you break into the world of Digital Art by giving you the information that I had to search for or learn by trial and error. It is my goal to save you time and alleviate any frustration you might incur while making the jump.

Learning to create with Digital Art Tools can seem frustrating at first but you have to realize that there are so many neat ways to edit your work that you can still be productive while developing your skills. The main thing is to keep an open mind and keep creating!

In this course you will learn about some of my favorite art programs that I have used for many years to create my style of art. We will cover Sketchbook Pro, Clip Studio Paint, the Procreate app, Adobe Photoshop, and Krita. You will learn about the tools that each of them have adopted from one another over the years as well as the ones that make them unique.

In the next section of this course we will cover 3 types of drawing devices. The Wacom Intuos 4 Medium Tablet, the Wacom Cintiq 22HD, and the iPad Pro 12.9 / Apple Pencil. This will give you a good range of what is available to you as a Digital Artist.

Then we will jump into using these tools to produce 2 different art projects. This will allow you to see how I use these to create my Digital Art on a daily basis. I will explain my Drawing and Painting process and how I use the tools to make edits. The main focus here is to get you to feel more comfortable with these tools. Many artists experience a feeling of disconnect and that is entirely natural when trying something new. You will overcome it with patience and practice. I assure you and I am speaking from experience!

Watch the Introduction Video to this Course here –

I am here to help you. If you take this course and have any questions please send me an email through my website form. I will help you as quickly as possible. If you have any ideas for new lessons that will make this a better learning experience for everyone, then I will be more than happy to add them to this course!

This course is currently 4 Hours long + Art Files and Brushes

Get Lifetime assess to this course here on my Gumroad – https://gum.co/eAnSS

or Watch it here on Skillshare –

https://skl.sh/2Ik1PnV

Thank you for considering my content and good luck with your Digital Art! 🙂

-Robert

Dynamic Anatomy for Artists – Drawing the Muscles of the Arm

As artists and especially as comic artists we have to have a good understanding of human anatomy. It is not an easy task but it is definitely worth the effort. You can immediately tell when an artist spends time doing their studies of the human body. From gesture and figure drawing to countless illustrations of the complex muscles and their relationships, nothing about it is simple but it truly transforms your art into something to be desired.

I avoided these studies for far too long in my own career. Even after hearing criticism from professional artists and editors that I admired. We have all been there or will hear it at some point, “You need to work on your anatomy! It is never fun to hear a comment like that but it is the cold hard truth. If you want to be a great character artist, you need to study anatomy.

So let’s stop avoiding what we know we need to learn. I created these lessons to help simplify the anatomy and make the drawing process easier to accomplish. In this first class we will focus upon the Arm Anatomy. Here is the class introduction to let you know what you can expect to gain from it –

Welcome to my class, “Dynamic Anatomy for Artists – Drawing the Muscles of Arm.”

Dynamic Anatomy of the Arm for Artists

I am extremely excited to bring you these lessons on drawing the muscles.  Learning anatomy isn’t easy but it will vastly improve your ability to draw impressive character designs and comic book superheroes.

What You Will Learn in This Class – 

  • How to Draw the Muscles
  • Basic Terminology
  • Visual Patterns
  • Form + Volume
  • Stylizing the Work
  • Efficient Ways to Improve

This class is designed to simplify the process of drawing the arm anatomy.  I will teach you the basic forms that I use to draw the arm from memory and you will get access to all the art files to study along with.  Including diagrams with all the terminology.

Don’t beat yourself up though!  Just try to improve a little each day and commit a muscle or two to memory here and there.  Consistency is the most effective way to improve in my opinion.  Rome wasn’t built in a day, right?! 😉

Dynamic Arm Anatomy Drawing

After you work through the anatomy breakdowns I will show you how to implement this into a few examples. We will work on these to help you transition your new skills into your own stylized version.

Signup for this class here on Skillshare – https://skl.sh/2REAuCA

or

Get the Lessons Here on Gumroad – https://gum.co/pXUkR

I am here if you have any questions and remember you can send your artwork for me to review by using my contact form here on the website. You can also submit your artwork as a project file on Skillshare as well. Next we will be covering Leg Anatomy so I hope you will join me for that class as well! 🙂

Sincerely,

Robert A. Marzullo

Ram Studios Comics

www.staging.ramstudioscomics.com


How to Draw Smoke + Clouds + Explosions for Comics

In my latest Youtube video I explain how to draw some of the basic dynamics for smoke, clouds, and explosions. These effects are widely used for comics and other forms of storytelling.

Drawing Smoke Clouds and Explosions for Comics

Check out the video below to see these two effects created!

Hopefully this post + video will help you get a bit better at drawing these elements within your own work. Remember if you don’t get it right the first time there is nothing to worry about. I didn’t either! Let’s jump in and start practicing.

Drawing Smoke

Let’s first start by drawing some basic smoke coming off a smoke stack. This is used in countless scenes in comics and is pretty much my favorite one to draw.

You can have this effect swirling in the background and make any city scene immediately look 10 times cooler. ( In my opinion of course! 😉

Step 1 – Start by drawing the area of influence or the basic flow of the smoke. Don’t be afraid to swirl it around a bit. I like to think about ribbons and scrolls when drawing smoke.

Drawing Smoke - Step 1
Drawing Smoke – Step 1

Step 2 – Erase back your construction lines or turn the opacity down on your layer. Then draw the smoke again with a bit more clarity. I like to go back and forth from thick to thin forms as the smoke rolls around. This way it looks more organic and dynamic. Use S and C curves for energy.

Drawing Smoke - Step 2
Drawing Smoke – Step 2

Step 3 – Draw in some of the interior lines. These can swirl around any which way you want. I like to start envisioning how the smoke might look with color at this stage. It helps me to think more dimensionally about the work as I go. You can also add in some line weight at this stage as well.

Drawing Smoke - Step 3
Drawing Smoke – Step 3

Next just ink and color it and voila! Comic book smoke! Just play with lots of variations and see what you can come up with. There is no right or wrong way with comic book smoke and art in general for that matter. If you’re having fun then your on the right track! 🙂

Watch my this Youtube video on the subject and get more tips and tricks on creating more effects.

I hope you enjoy the tutorials and more on the way soon!

Check out my Gumroad Store here for Video Course Content and Custom Brushes – http://www.gumroad.com/robertmarzullo

Let me know what other topics you would like to see covered on this blog and I will do my best to answer them with a new tutorial. I love doing break downs like this and your ideas help me to focus on what to do next.

Keep Drawing and Keep Having Fun!!

-ROB

For Aspiring Comic Artists

Hello Fellow Comic Artists!

My name is Robert Marzullo and I have been drawing comics since I was about 14 years old. ( Getting ready to turn 44 ) I was first published when I was 18 in an independent series called Aerial and Assault by Tyme Press. I have since published my own comic Blackstone Eternal and I am the author of the book “Learn to Draw Action Heroes”. I have done many other things as an artist but this is about creating comics so I won’t list everything. I don’t want to bore you to death!

The main thing I want to impart on anyone reading this is that if you want to be a comic artist you have to just start creating comics. I wish I would have focused more of my time creating comics rather than trying to figure out how to get into comics. The act of doing is the most important part. Nothing will grow your skill set quicker than actually drawing page after page of sequential storytelling. I only have a total of 5 comics under my belt but I have noticed great improvements from completing each of them.

Blackstone Eternal Comic Book Art by Robert A. Marzullo

You might say, “I draw every day already. I draw pin ups and splash pages!” So that is enough, right? Wrong! That actually can hurt you as much as help you unless you are specifically going to be a cover artist and the odds are you won’t start there. Pin ups are great but they don’t tell much story. You won’t learn how to direct the viewers eye through the page, you won’t get as good at drawing the same character with a variety of emotions, you won’t develop your ability to move the camera in and out of the scene more confidently, and the list goes on. You learn these things by drawing a comic book. You also need to practice working from a script not just drawing whatever pops into your melon while your watching Netflix, Hulu, or YouTube! ( Make sure to visit my channel by the way! 🙂

You may look at my work and say, “Rob, you draw Fan Art all the time!” You’re right, and that is why I can honestly speak from experience. I have drawn comic books and I have drawn countless pieces of fan art. Guess which ones will get me more offers to work on a title. Yep, sequential art. I don’t currently get calls from the big guys like Marvel, Dc comics, or Image but when I draw and post sequential pages I get more offers from other independent comic book creators.

Blackstone Eternal Comic Book Artwork by Robert A. Marzullo

I am speaking from my own experiences but also reconfirming what I need to implement in my own strategy. If I want to work in comics I need to draw amazing stories that show the viewer what I can do. Besides, working through a series of pages from a script will expose my flaws and that is exactly what I need to fix within my work so why fight it.

So I challenge you to get out there and create some comics! Throw a script together or find one online and put yourself to the test. If you can’t muster up a 22 page book then go for a short story. Show it off to everyone you know and accept the criticism so that you can make the next one even better. Don’t be afraid to make mistakes. There is no such thing as a perfect comic or a perfect piece of art. Remember, done is better than perfect!

Good luck to you and thank you for reading my blog! Check out my YouTube channel for more content on drawing comics – http://www.youtube.com/c/robertmarzullo

Get my Video Course content and custom brushes here on my Gumroad – http://www.gumroad.com/robertmarzullo

-Robert

Drawing Amazing Backgrounds with Perspective – Step by Step

Welcome to my next online Course, “Drawing Amazing Backgrounds with Perspective – Step by Step.”  This course will teach you how to use 1, 2, and 3 Point Perspective to create interesting and imaginative backgrounds.  You will work with me as we draw an illustration for each example.   This will allow you to learn not only how to use these powerful techniques but also how to create environments from imagination.  

Drawing Amazing Backgrounds with Perspective

You will learn a variety of techniques to create shapes with dimension through these lessons.  Such as cubes, pyramids, archways, and angles.  By the end of this course, you will have a better understanding of how to draw rooms, buildings, brick walls, windows, furniture, and all with Linear Perspective!

Things we will be Focusing on in this Course

  • Creative Design Thinking
  • Expressive Line Making
  • Depth + Scale within Our Scenes
  • Mapping Out Space in Perspective
  • Adding Values for Portfolio or Client Work
  • Correcting Flaws within the Work

This course is designed to teach you how to draw detailed backgrounds step by step.  You will be drawing an alleyway with one-point perspective, an interior room with two point-perspective, and a view looking up at various buildings using three-point perspective.  These will each be created with a different style to give you the most versatile experience possible.  It is important that you not only learn how to draw with perspective but also how to create a variety of styles with these techniques.  I want my students to be able to relate this information to comics, storyboards, and animation.  If you learn to be versatile as an illustrator you have a much greater chance of success.  This is what I have experienced in my career and I want to share that with you!  Drawing background with Linear Perspective is an extremely important asset to have as an artist.  So let’s get started right now and put Perspective Art in your toolbox!

Get Lifetime access to this Full 7 Hour Course here for $10 – https://gum.co/KzRWK

I am here if you have any questions and I value your feedback!

-Robert 

Drawing Comic Style Art in Procreate – On the iPad Pro

Venom Comic Art by RAM

Hello Everyone!

I hope all is well on your side of this crazy rock. I am having fun drawing some new fan art and I wanted to share a few things I have learned while doing so.  For those of you that don’t know my process let me explain.  I have been drawing comic art for over 20 years now and I used to work on good old bristol board but a few years back I decided to start working digitally. ( I was a messy inker! :>)  I know people are rolling their eyes right now.  Real artists use traditional tools, right?  I get it, you’re in love with the feeling of real paper.  I don’t blame you, I draw on paper as much as I can too.  Something about it just feels…..you know…natural!  I switched because I am a big fan of technology and I like to be on the forefront  of it all.  Plus, I really just wanted to ink digitally but then later realized the pencils were possible as well.  By creating all of it digitally I was saving a lot of time.  I no longer had to scan my pages which was always a pain.  I know a lot of artists just don’t want to make the switch.  I truly don’t blame you, to each their own I guess!

So when I started drawing digitally I bounced around to a few different drawing softwares.  I quickly realized Manga Studio 4 could create full comic books as a single document and gravitated over to that.  I was a little less than enticed about the drawing process on there.  I was still using an  Wacom Intuos 3 at the time so that was a bit of a hinderance as well.  I hadn’t fully gotten used to drawing on a “lap tablet” as I like to call them.  Then I switched to Sketchbook Pro for the pencils and it started to feel more natural.  Once I finally upgraded to a Wacom Cintiq 22, I was like a kid in a candy store!  I finally had a really nice drawing experience going on.  I could pencil and ink all on this device and with the two programs I felt like I was really getting somewhere.

With each new update the programs have gotten better and better. ( For the most part. ) I still didn’t feel like I was creating to the level that I could achieve on paper though.  Keep in mind, there is a learning curve with any and everything, so part of it could have been that.  I truly believe you can create amazing art with anything if you put your mind and heart into it!

Almost two years ago I started hearing people talk about the new iPad Pro coming out.  I was a bit skeptical at first.  Maybe good for amateurs but I am a pro and I need a big fat Cintiq on my table.  ( By pro I mean a starving artist of course. lol )  Upon seeing other artists work on this device I was quickly sold.  I loved the fluid marks they were making.  I also thought the Apple Pencil looked more comfortable to work with.  Plus I really wanted to be portable with my art creation process.  After taking the leap of faith I was quickly at home using the device.  It was very intuitive and I was creating the style of art I like rather quickly.

The only issues I had was not being able to use all my favorite programs.  I felt a bit stuck.  I really enjoy the feel of the device but was missing some great apps to take advantage of it.  I even used Astropad for a short time to help bridge the gap but it didn’t fit well into my workflow.  I then started using Procreate more and more.  Within a few updates this app was really starting to appeal to me.  Plus, it records videos and I am such a Youtube junkie these days! 🙂

You can check out my channel here by the way – http://www.youtube.com/c/robertmarzullo

The Procreate app is extremely well designed.  It moves quickly and the interfaces is so streamline you will forget it is there.  The brush engine is nothing short of amazing and it has the most natural drawing experience I have found thus far.  The Venom art above was drawn in this app.  About 90 percent of my work is done there now.  I still jump over to my Cintiq when I need dual monitors and have to get some multi-tasking done but I quickly jump back over to my iPad Pro and Procreate combo to knock out some sketches or comic art.

So I just want everyone that reads this to know that the iPad Pro and Procreate is a VERY solid solution to creating professional art on the move.  Great battery life and stable as can be!  I am here if you have any questions I can help with and if you want to learn more about how I use these two together you can check out my Udemy course here – https://www.udemy.com/procreate-like-a-pro-create-awesome-digital-art-on-an-ipad/?couponCode=RAMCOMICSPOST101

Good luck with your art and thanks for your support! 🙂

Robert A. Marzullo

Ram Studios Comics


Why It’s Important to Thumbnail the Artwork First

Spider-man and Spider-Gwen

I often get into a bad habit of drawing whatever comes to mind.  I mean to say, when I start an image I don’t always know exactly where I want it to end up.  When I see myself do this too many times I get back to the basics to fix it.  That is when I go back to drawing thumbnails like a good little artist should! 😉

Thumbnailing  helps you to know where the artwork should end up. It is a way to establish a set of ideas without wasting a huge amount of time.  Another way to say it is just “rough sketching” but I think thumbnails are the preferred terminology in comics.

You can work out things like poses, composition, camera angles, movement, energy of the shot, and shapes of shadows.  In my opinion, you want to get as much information about the end result as you can within about 2-5 minutes of sketching.  This also sparks creativity immensely!

After rough sketching about 5 thumbnails I am usually pretty set to go on my drawing but hey at 2 minutes long no big deal if you need to create a few more, right?

If you want to see a video of this drawing from the thumbnail sketch to the finished pencils  you can watch it here on my Youtube channel –

Let me know what you think of it and as always, Keep Drawing and Keep Having Fun! 🙂

Robert A. Marzullo

Ram Studios Comics


Procreate Like a Pro: Create Awesome Digital Art on an iPad – Udemy

Procreate Like a Pro: Create Awesome Digital Art on an iPad

Procreate Like a Pro: Create Awesome Digital Art on an iPad

In this course you will learn about the app in two fundamental ways. You will watch me explain the interface while demonstrating the hand gestures that are used to complete various tasks. You will learn how to import and export images, flip the canvas, share the  work in various formats, export video, setup the perspective tools, and adjust the interface to your preference.

Want to Learn How to Draw on an iPad?

In the next section I will take you through a complete illustration from start to finish. This will allow you to see and work through the process of creating the illustration and commit it to memory. You will learn about the brushes, layers, blending modes, lock transparency, selection tools, color adjustments, and general tips and tricks on painting various effects with texture.

By the end of this course you will have created a fun and informative art project. I would love to see what come up with and I would be happy to give you any feedback I can. Just share the work in the Q+A Section when you are done!

Get this course here  – https://www.udemy.com/procreate-like-a-pro-create-awesome-digital-art-on-an-ipad/?couponCode=RAMSTDIOSCOMICS101

Promo Video –

Robert A. Marzullo

Ram Studios Comics